
Which brings me to my quest for the perfect notebooks! If you can't find what you are looking for out there, make your own! While reading one of my favorite blogs, Satori Smiles I came across a post about her creating her own notebooks with a binding machine. I immediately fell in love with the idea, and promptly purchased one from Office Depot online, as well as some spines, and different types of paper. (If you plan on doing this, be sure to check for online coupon codes! I saved a bundle and it shipped free to my home!)
It seems expensive, but after coupons, and taking into account that I can use this for years, it is well worth it. So far, I have created a reading log, some drawing pads, my own homeschool planner (a whole other post!), 3 nature journals, and a dictation notebook. It is well on it's way for paying for itself already!
This is my first project with the ProClick; a reading log!


Isn't it adorable? I cut down 12x12 scrapbook paper for the outside cover, added a sticker to the front, and used unpunched, ruled paper for the inside (also purchased at Office Depot). It was so easy that I find myself looking for things to bind daily.
Here are some pics of how I made a drawing pad. First, you gather your supplies. The blue thing is the actual binding machine. In front of that is the spine, my paper, and the binding tool.

Stick the paper in the binding machine, making sure it is nice and even. I did about 4 sheets at a time.

Then you pull that little black handle you see at the top, and make it come down to the bottom. Presto! You have holes in your paper!

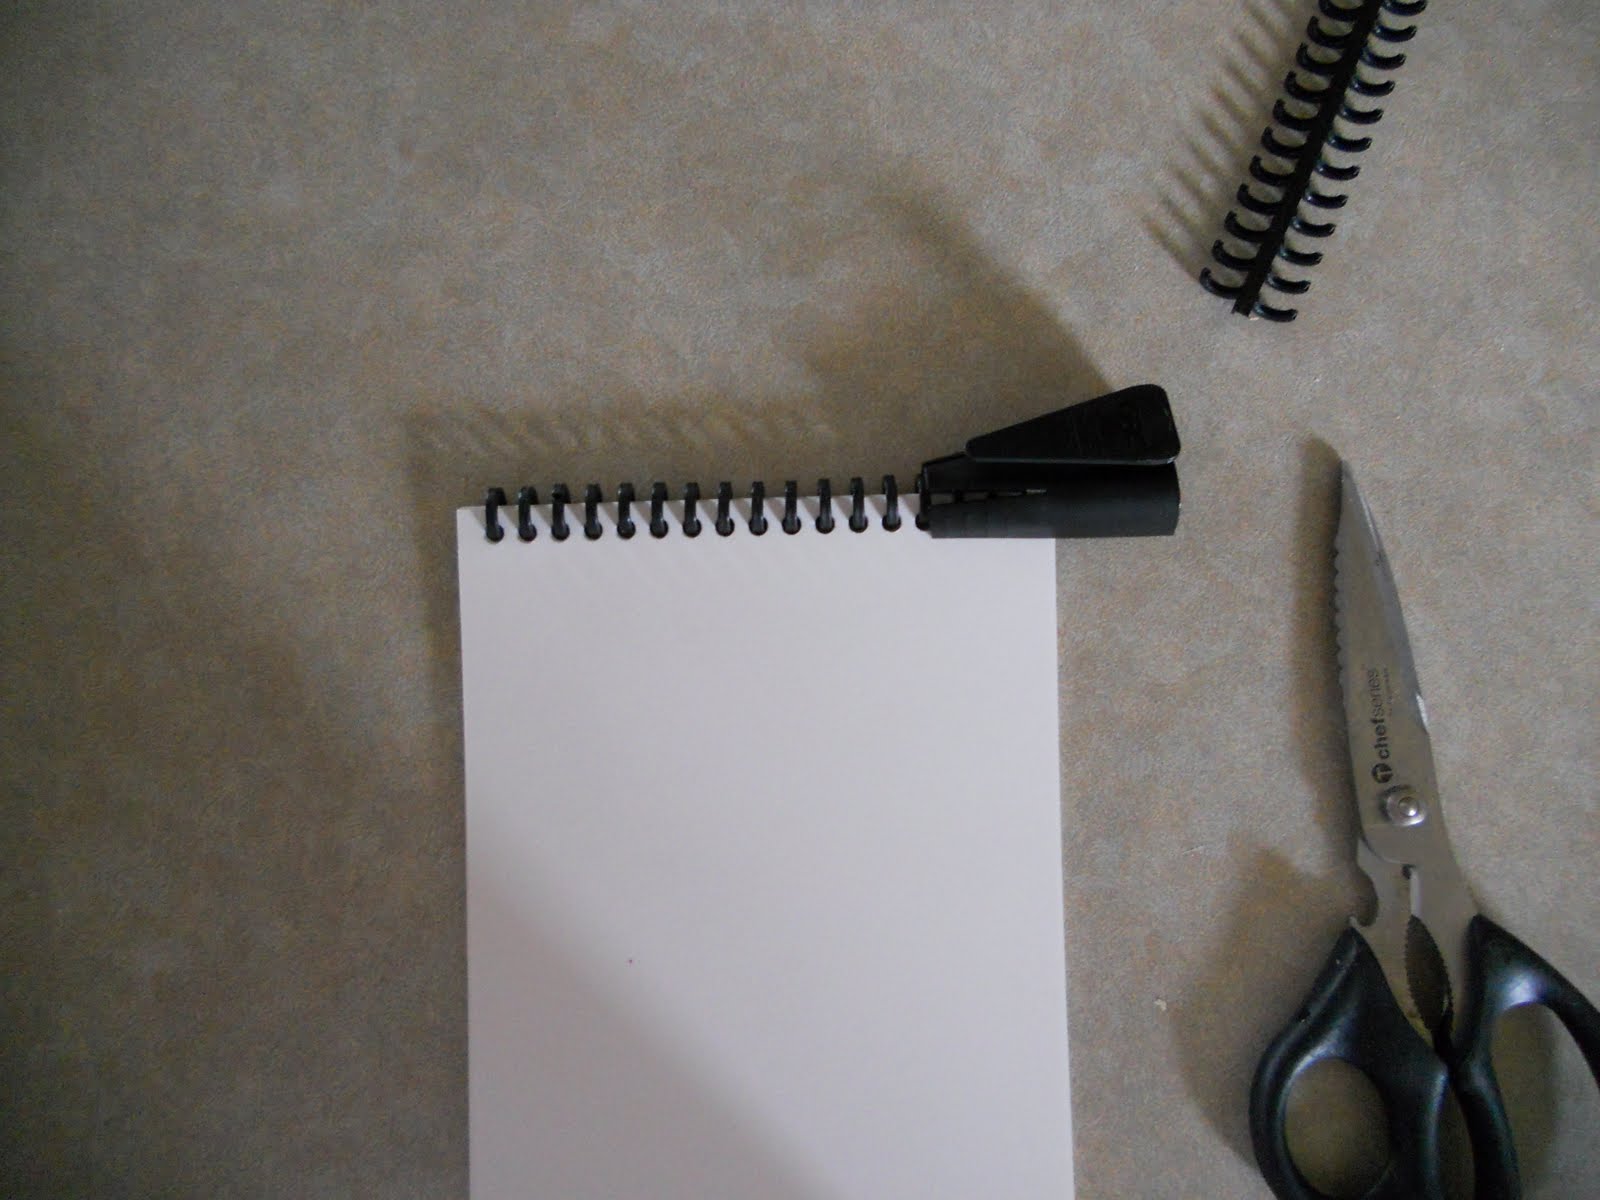
Line the holes up with the binding spine.

As you can tell, mine is a little bigger than I need, so you just trim it to size. They cut easy with a pair of scissors.

Then, you will need to close the first couple rings on your own, they snap together very easily. You could snap the entire thing with your fingers, but the little tool is included so, why not? You just run the tool down the spine, squeezing it.
And you're done! Sometimes I add a pretty cover made of heavy card stock, sometimes I laminate the cover if it is going to be used a lot, or has a possibility of getting wet (nature journal).

I have to warn you though, it is highly addicting. Before you know it you may start binding your monthly bills together.
Enjoy!
No comments:
Post a Comment